In this article, we will explore the process of migrating a static website to Azure using Azure Blob Storage.
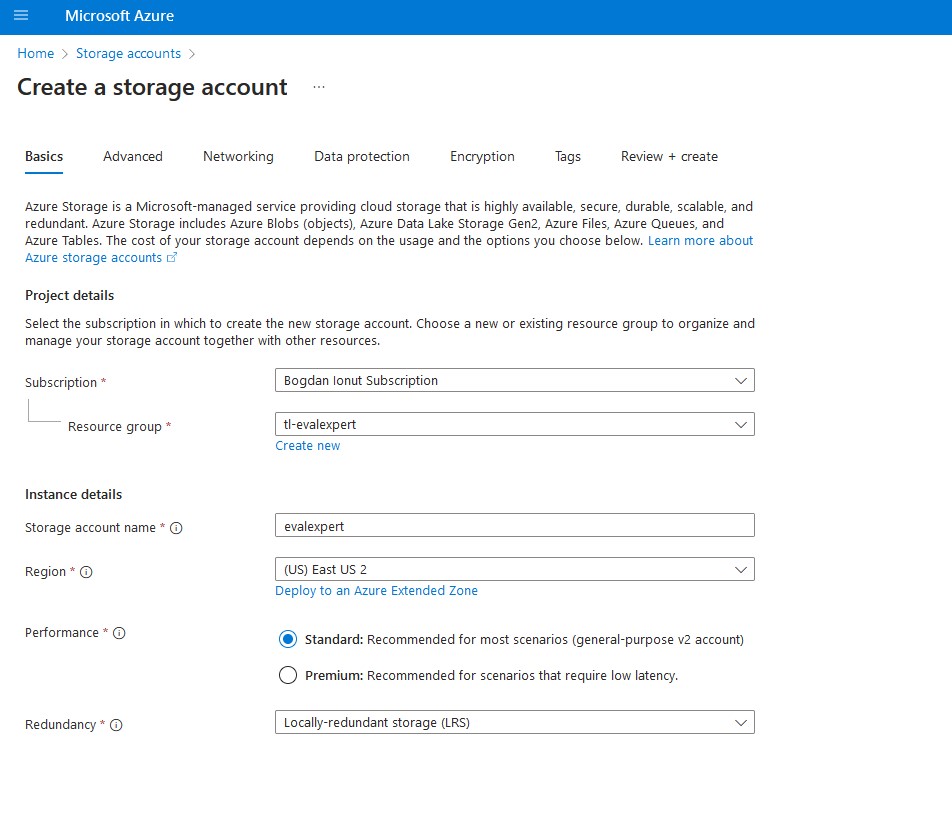
Navigate to the Azure portal and click on “Storage Accounts” or use the search bar to locate and select “Storage Accounts.” Then, click on “Add.”
For the purpose of this blog post, we will keep the Region and Performance settings at their default values. However, it’s important to familiarize yourself with these options and adjust them according to your requirements. Note that the Account kind must remain as “StorageV2” to enable hosting of a static website. Additionally, consider modifying the Location if you do not plan to utilize Azure CDN.
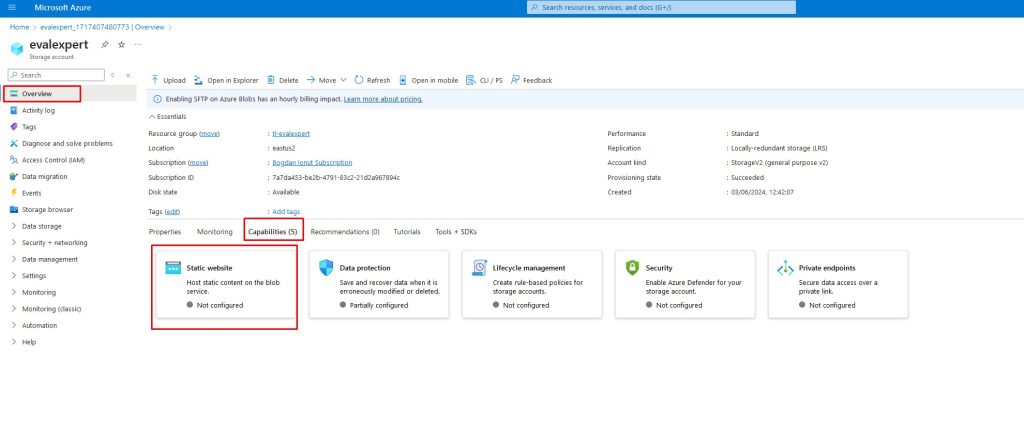
To leverage the power of Azure Blob Storage for hosting your static website, you first need to enable static website hosting on your storage account. Navigate to the account’s Overview pane and select the Capabilities tab. Here, you’ll find the option to enable Static Website hosting.
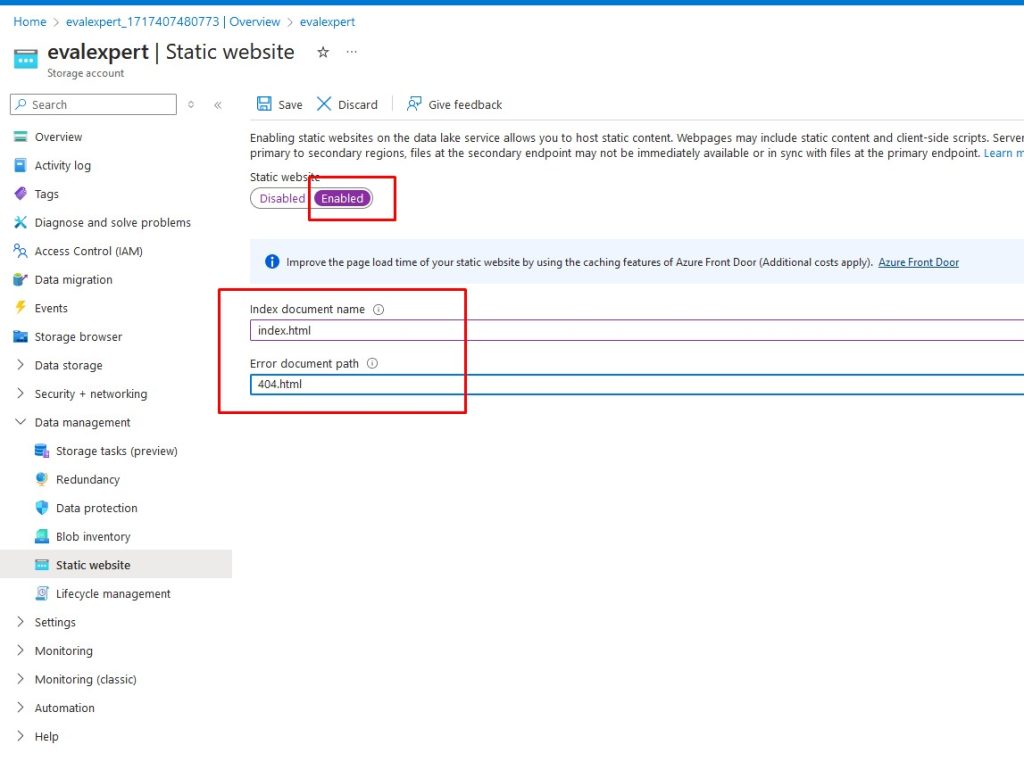
Once enabled, specify the default index document (e.g., index.html) and error document (e.g., 404.html). Click ‘Save’ to finalize the configuration, and your static website will be ready to serve content efficiently from Azure Blob Storage.
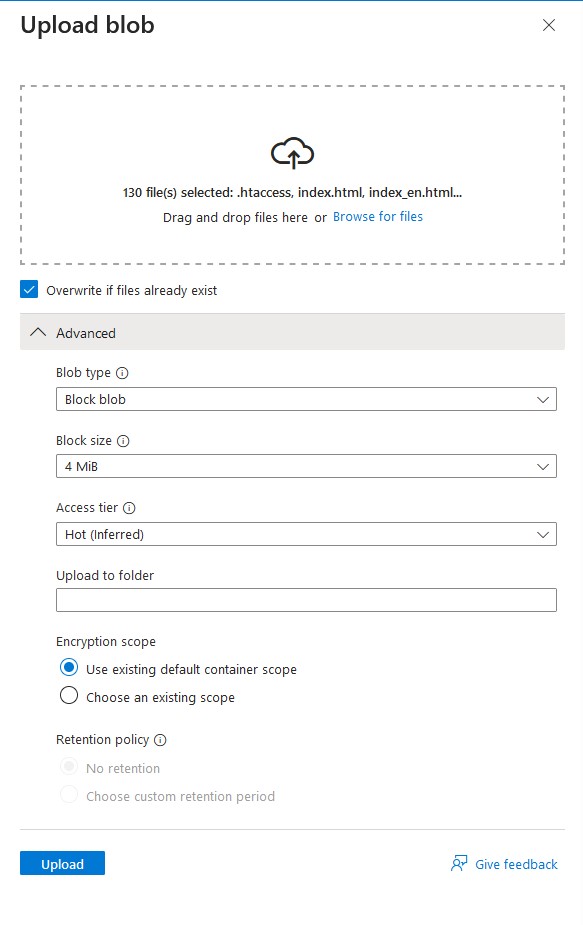
Next, I uploaded the website content.
And the site was live! Unfortunately, I made a mistake, and instead of opening the website pages, they were being downloaded. So, let’s take a look at this issue

The issue arose because the content-type of the files was not set to text/html, so I had to update this setting for all files.
