In this post, I’ll walk you through the journey of migrating my WordPress blog to Microsoft Azure. We’ll explore why Azure is a prime choice for hosting WordPress sites, focusing on the advantages of scalability, security, and improved performance. I’ll detail each step from setting up the initial environment in the Azure portal to selecting the right hosting plan and finalizing the migration process.
Choose Your Azure Environment
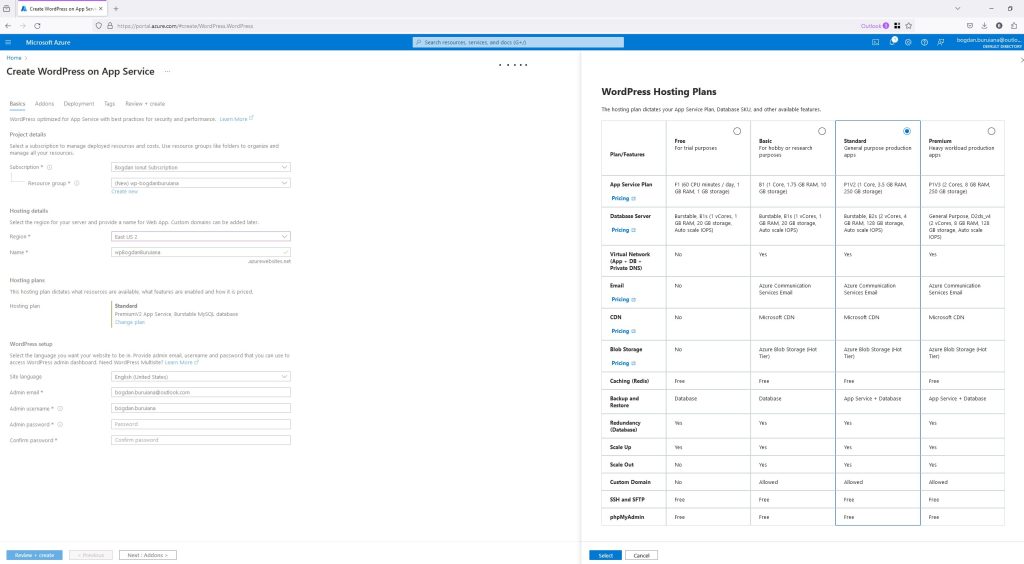
First, you need to navigate to the Azure portal. Once there, start creating a WordPress instance on Azure’s App Service. This service is optimized for performance and security, making it a great choice for hosting WordPress.
Set Up Project Details
Subscription: Select the Azure subscription you want to use for billing purposes.
Resource Group: Create a new resource group or select an existing one. This is where all the resources related to your WordPress site will be managed.
Configure Hosting Details
Region: Choose the region closest to your user base to minimize latency and improve load times. For instance, if most of your audience is in the US, ‘East US 2’ might be a good choice.
Instance Details: Provide a unique name for your web app, which will also be part of your default domain name on Azure.
Select a Hosting Plan
Azure offers various hosting plans depending on your needs:
Free: Best for trial purposes. Limited to 60 CPU minutes per day.
Basic: Ideal for hobby or research sites with more CPU and storage.
Standard: Geared towards general-purpose production use, offering more power and storage options.
Premium: Designed for heavy workload production apps, featuring more powerful CPUs and additional storage.
For a typical WordPress blog, the Basic or Standard plan should suffice unless you expect high traffic or need extensive database use.
WordPress Setup
Admin Account: Set up your WordPress admin username and password. This will be used to manage your WordPress site from the dashboard. Database Configuration: Depending on your hosting plan, you might opt for an included MySQL database or connect to an external database service.
Review and Create
Before finalizing, review all your settings to make sure everything is correct. Then, click on ‘Create’ to deploy your WordPress site on Azure.
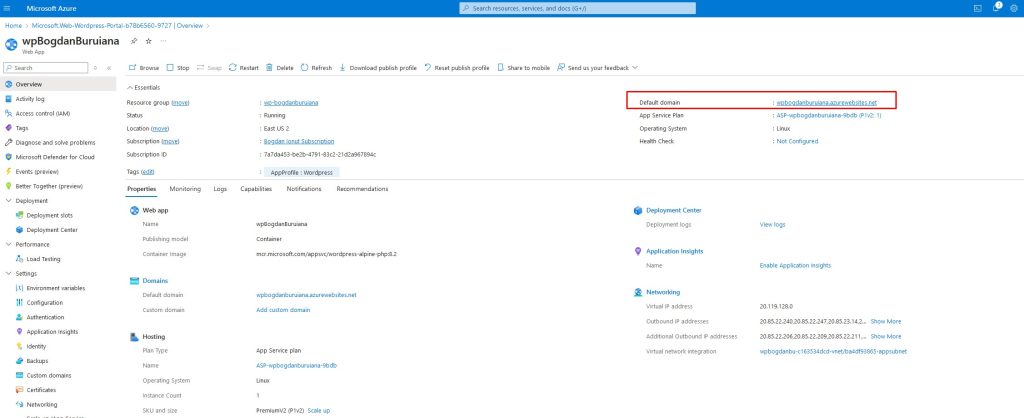
Post-Deployment
Once your site is deployed, you can access your WordPress admin panel by navigating to the URL provided by Azure. From there, you can start customizing your site with themes, plugins, and uploading content.
Consider Additional Features
Azure provides options for scaling up or out, adding custom domains, and enabling other features like CDN for faster content delivery globally. Consider these options based on your site’s performance and growth.
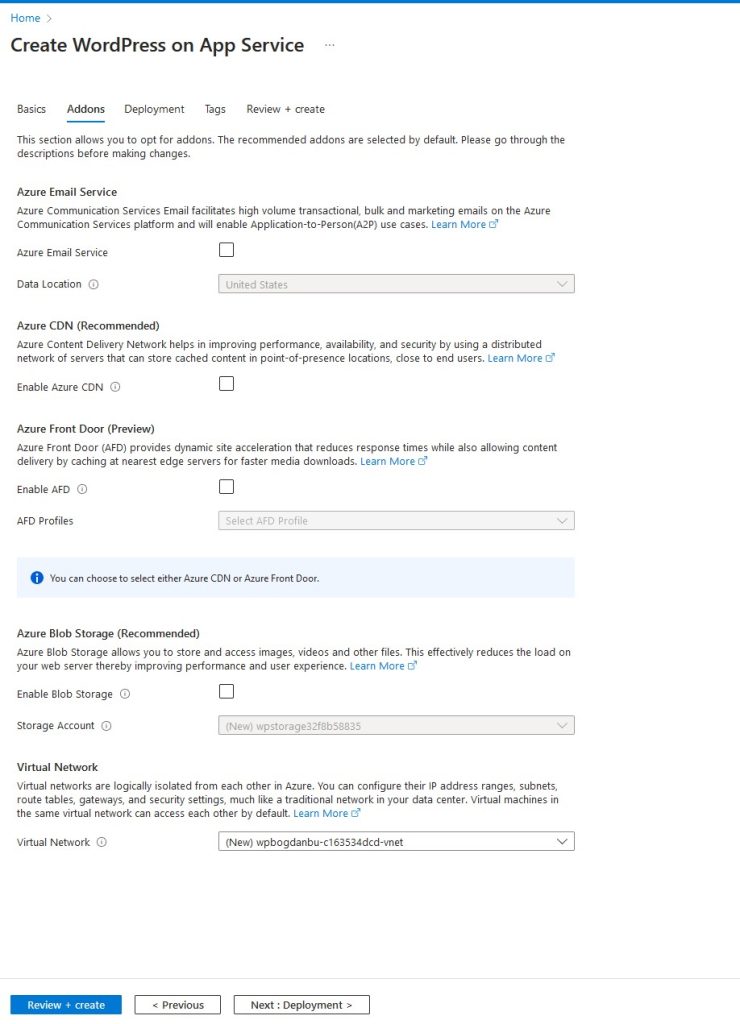
There are several recommended addons that can significantly boost your site’s efficiency. Here’s what you need to know about each option:
Azure Email Service:
What it does: This service supports high-volume email needs, such as transactional, bulk, and marketing emails.
When to use it: If your site sends newsletters, user confirmations, or promotional emails, this addon will be beneficial.
Azure CDN (Content Delivery Network):
What it does: Improves your site’s performance, availability, and security by caching content in locations close to your users, reducing load times.
When to use it: Highly recommended if you have a global audience to ensure faster loading times and reduced latency.
Azure Front Door :
What it does: Provides dynamic site acceleration that improves content delivery speeds by caching content at the nearest edge server.
When to use it: Useful for sites with dynamic content or high traffic, ensuring quick delivery and enhanced user experience.
Azure Blob Storage:
What it does: Allows you to store and access large amounts of unstructured data such as images, videos, and other files, offloading the heavy lifting from your server.
When to use it: Essential if your site handles a lot of media content, improving performance and scalability.
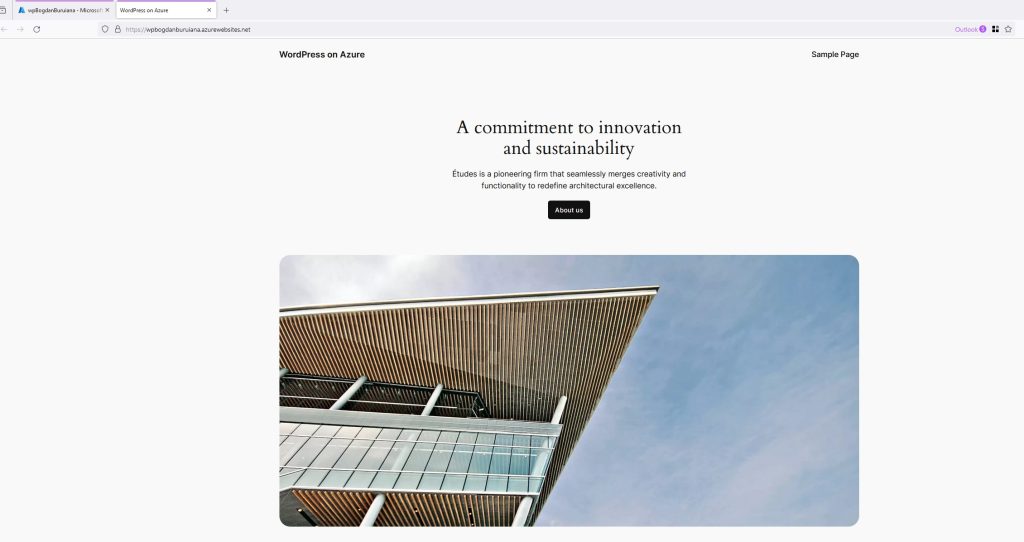
And done – the portal is working – we will continue migrating the existing one in a future post.