First of all, this is not the only way to upgrade an ESXi host, but it is the easiest from my opinion, considering that it is not necessary to use vCenter and vSphere Lifecycle Manager.
Step 1
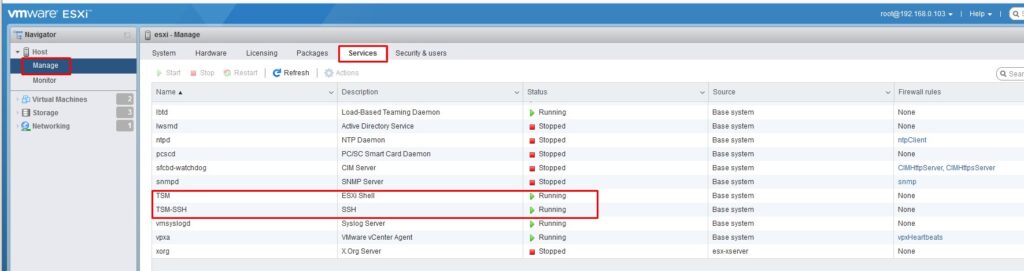
Enable ESXi Shell and SSH to access the command line interface on the ESXi host. From UI go to Manage > Services and start TSM and TSM-SSH services.
Step 2
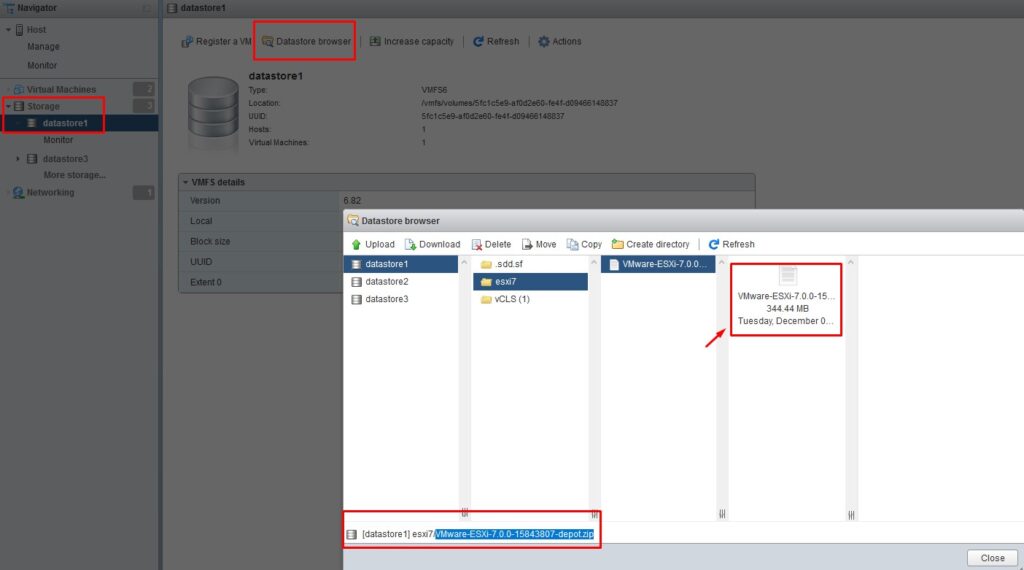
Download the ESXi 7 offline bundle from the VMware website, and upload it to the ESXi datastore. From UI go to Storage > Datastores, select the datastore (datastore1 in our case), and click Datastore Browser. Select a directory to store bundle files or create a new directory (esxi7 in our case) in the datastore browser and click Upload.
Step 3
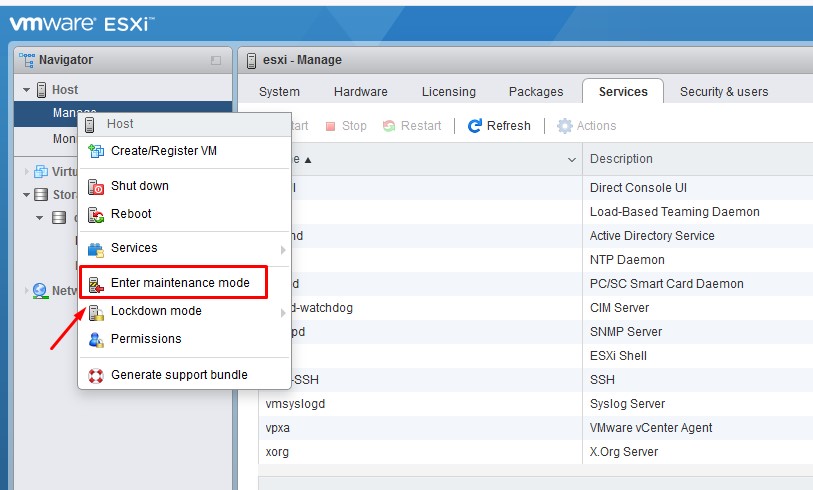
Make sure that there are not any VMs in the running state on this ESXi host and put the host into maintenance mode. From UI go to Manage > Right-click > Enter maintenance mode.
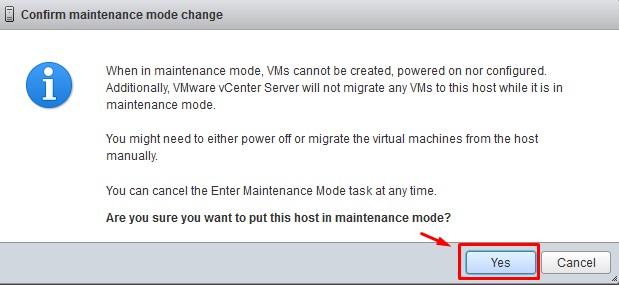
Confirm you want to put the host into maintenance mode by pressing Yes.
Step 4
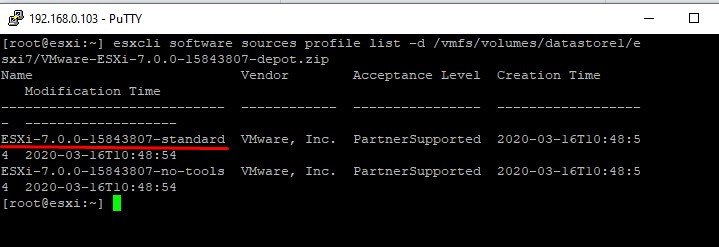
Run the esxcli command to view the image profiles within the ZIP bundle.
esxcli software sources profile list -d /vmfs/volumes/datastore1/esxi7/VMware-ESXi-7.0.0-15843807-depot.zip
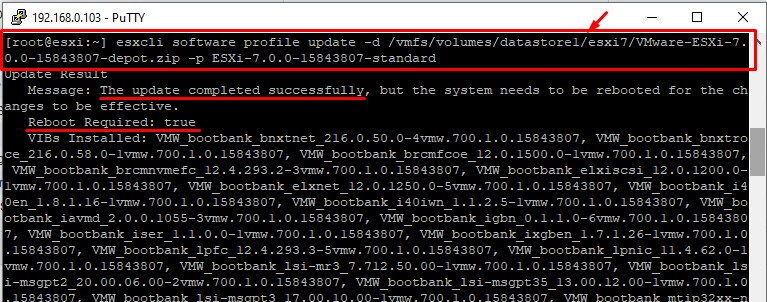
Step 5
Run the update command to upgrade ESXi 6.7 to 7.0
esxcli software profile update -d /vmfs/volumes/datastore1/esxi7/VMware-ESXi-7.0.0-15843807-depot.zip -p ESXi-7.0.0-15843807-standard
The update completed successfully and the system needs to be rebooted for the changes to be effective.
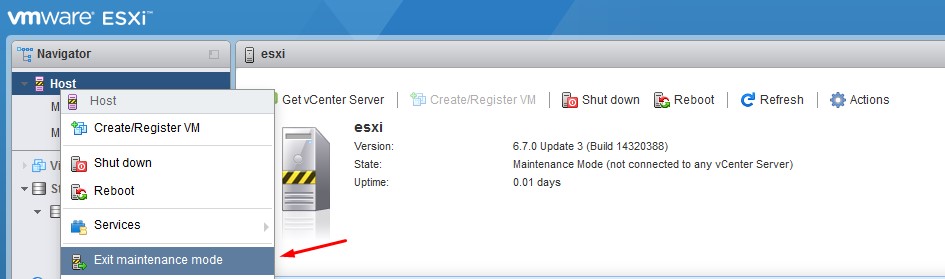
Step 6
Exit the Maintenance mode. From UI go to Manage > Right-click > Exit maintenance mode
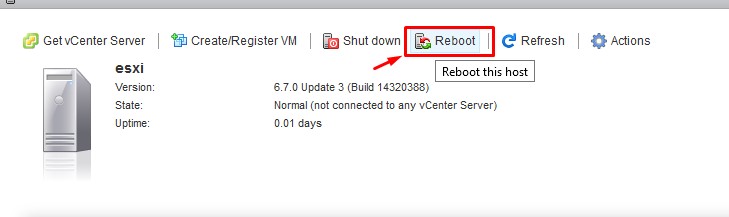
Step 7
Reboot your host. From UI go to Host > Reboot
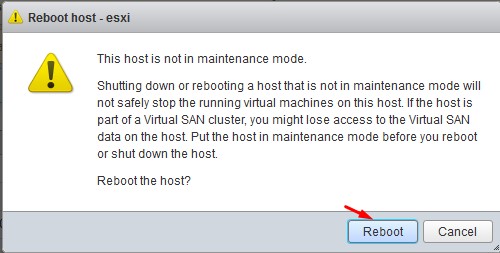
Confirm you want to reboot the host.
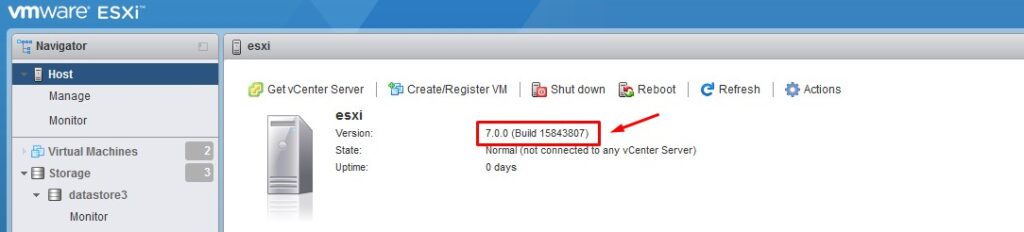
Step 8
After reboot, check you have the latest version. From UI go to Host.