In a previous post I’ve described how to create a nested ESXi solution and the benefits of use it. Now it is time to see it in a new exercise – migration of a VM using vMotion.
VMware vSphere vMotion is a zero downtime live migration of workloads from one host to another.
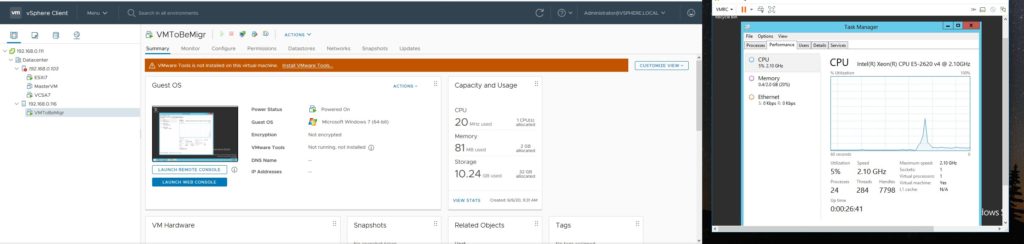
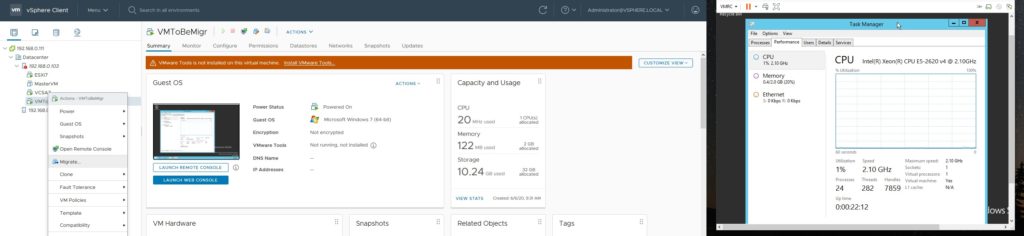
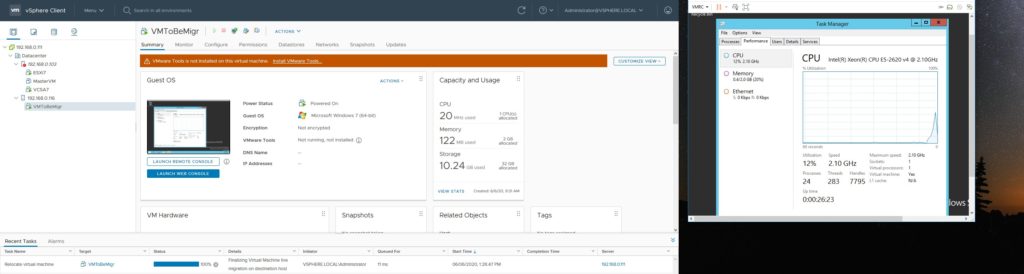
I’ve created a new VM called VMToBeMigr on 192.168.0.103 ESXi host, which will be migrated to another ESXi host (192.168.0.116).

I’ve turned on the new VM and launched in a remote console. Also, I’ve opened Task Manager to monitor the Uptime of VM.

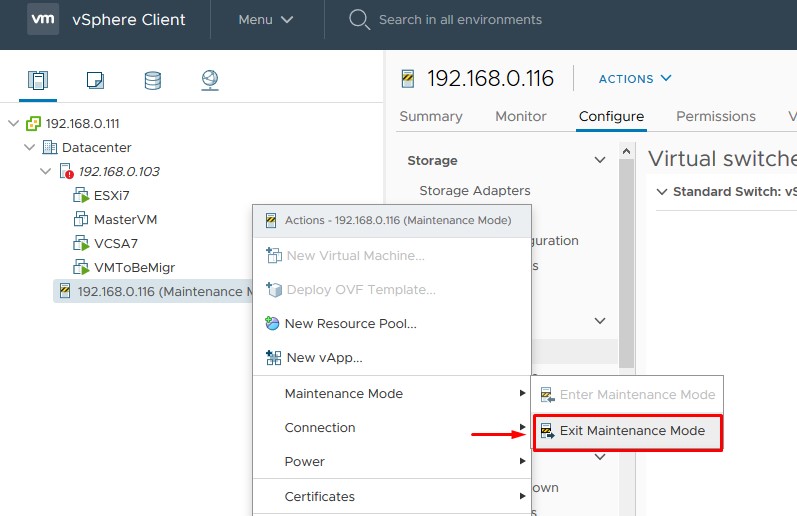
The first step was to exit from Maintenance Mode on the 192.168.0.116 ESXi host. Right click on the host, go to Maintenance Mode and press Exit Maintenance Mode.
Second step was to configure the vMotion network which enables live migration of my running virtual machines from one ESXi host (192.168.0.103) to another ESXi host (192.168.0.116).
This allows for high availability of service for VMs running in the vSphere environment and moving VMs due to hardware maintenance, updates, or other service interruptions at the physical layer. VMs can simply be moved to another host with no interruption.
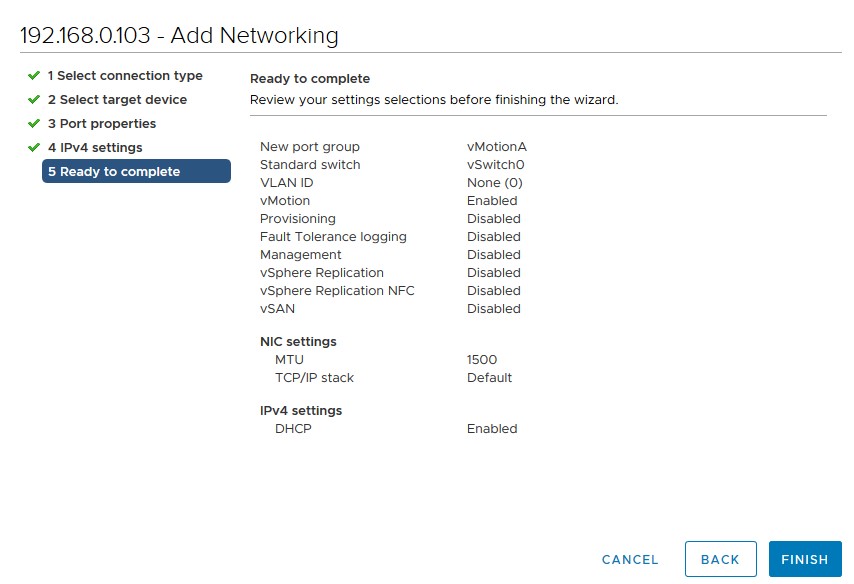
Go to Configure tab of ESXi, under Networking click on the VMKernel adapters. I’ve added a new VMkernel as the connection type (Fig.1), selected an existing standard switch (Fig.2) – vSwitch0 in this case – named Network label to be vMotionA, selected vMotion service (Fig.3), chosen to obtain automatically the IP address (Fig.4) and press Finish (Fig.5).
Fig.1

Fig.2
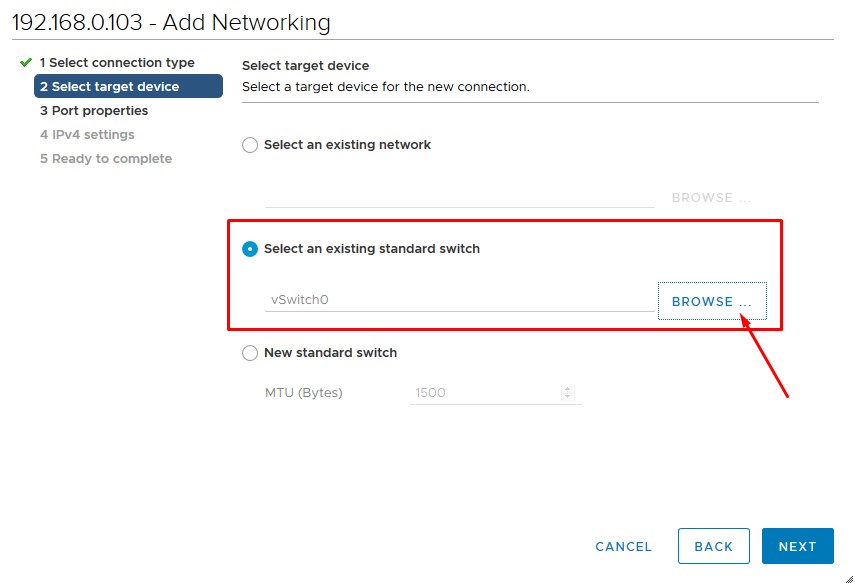
Fig.3
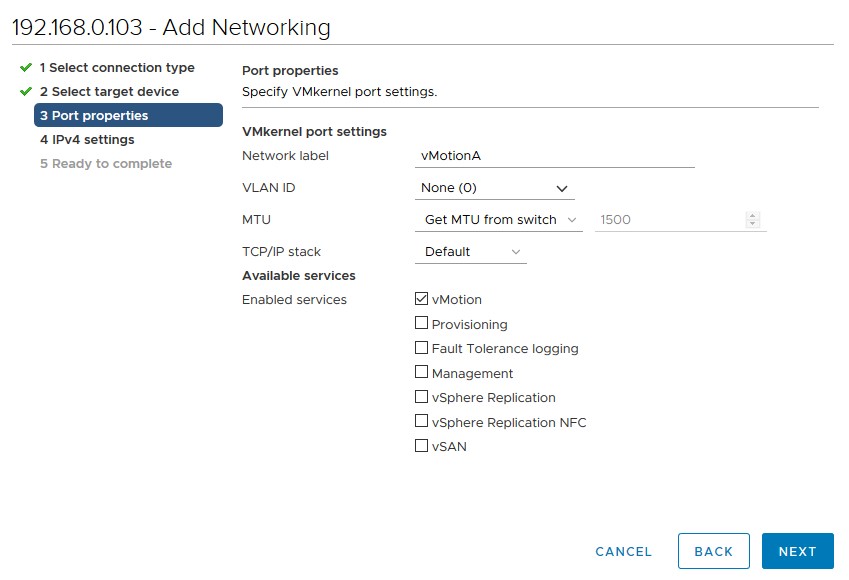
Fig.4
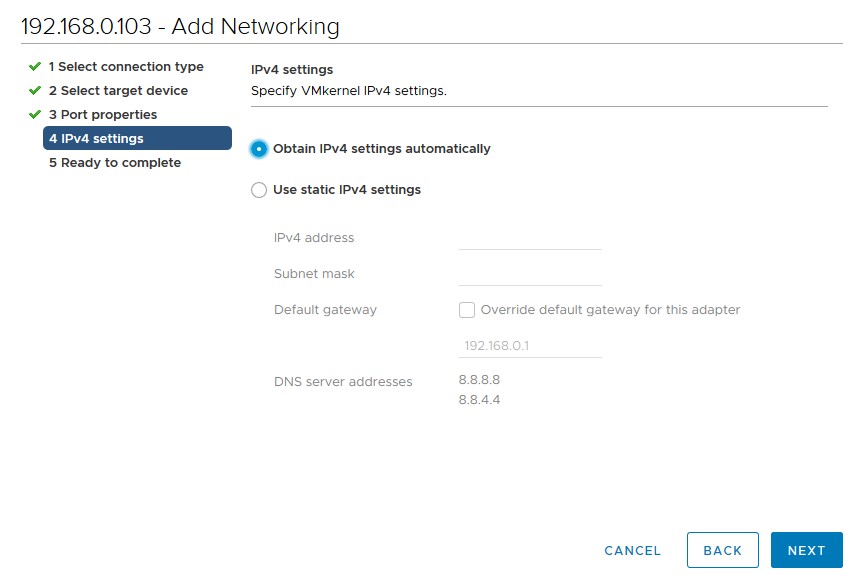
Fig.5
Select the VM you want to migrate – right click on it and select Migrate option.
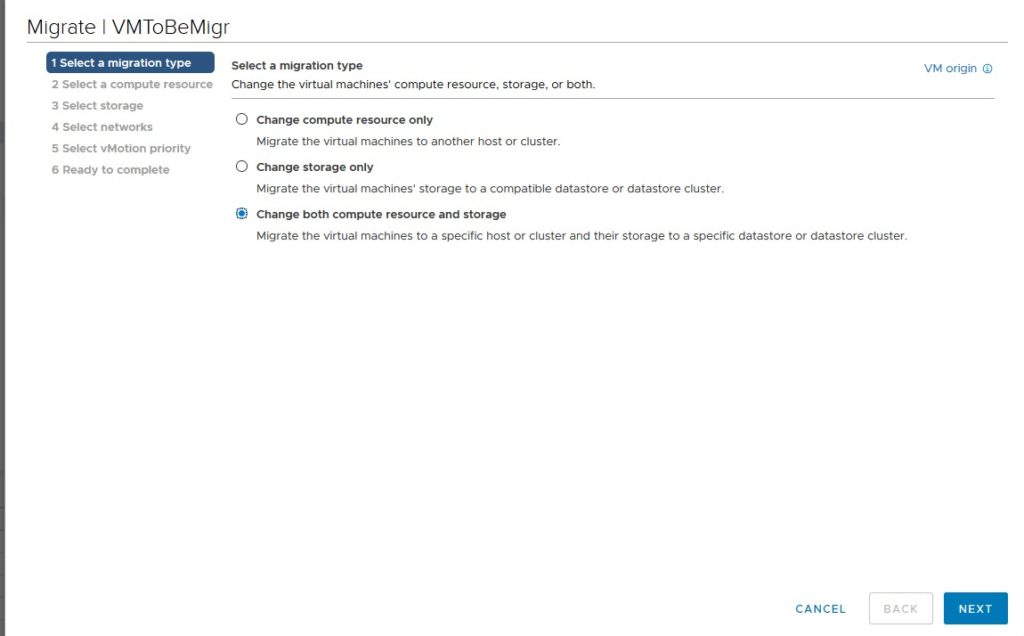
Choose the migration type you want to use it – I’ve chosen Change both compute resource and storage option.
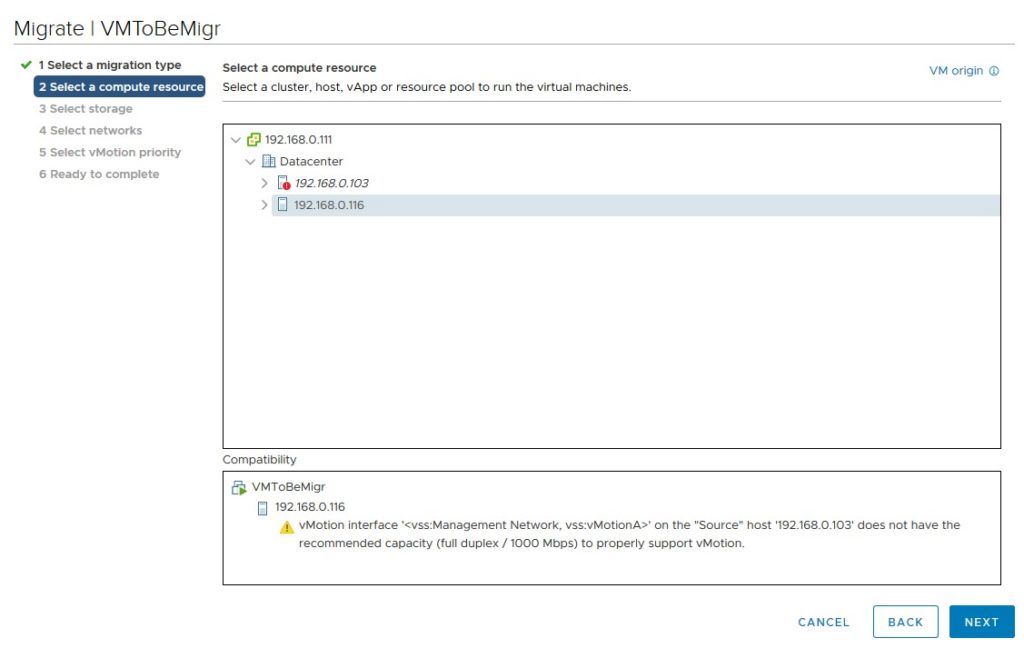
Select the new destination for VM
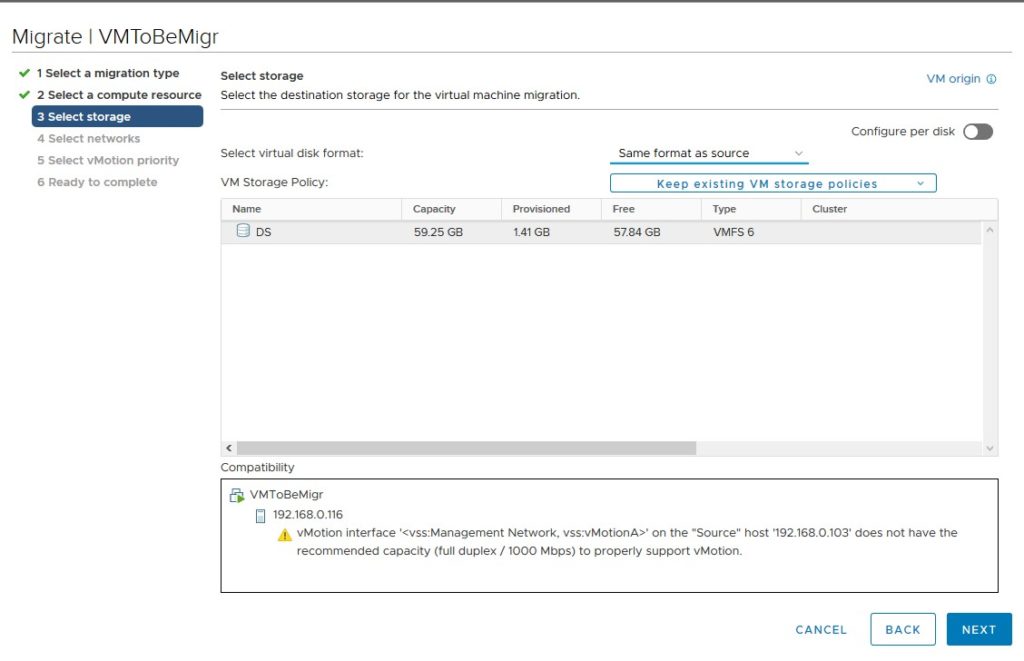
Select storage – in my case I have only one option (DS datastore)
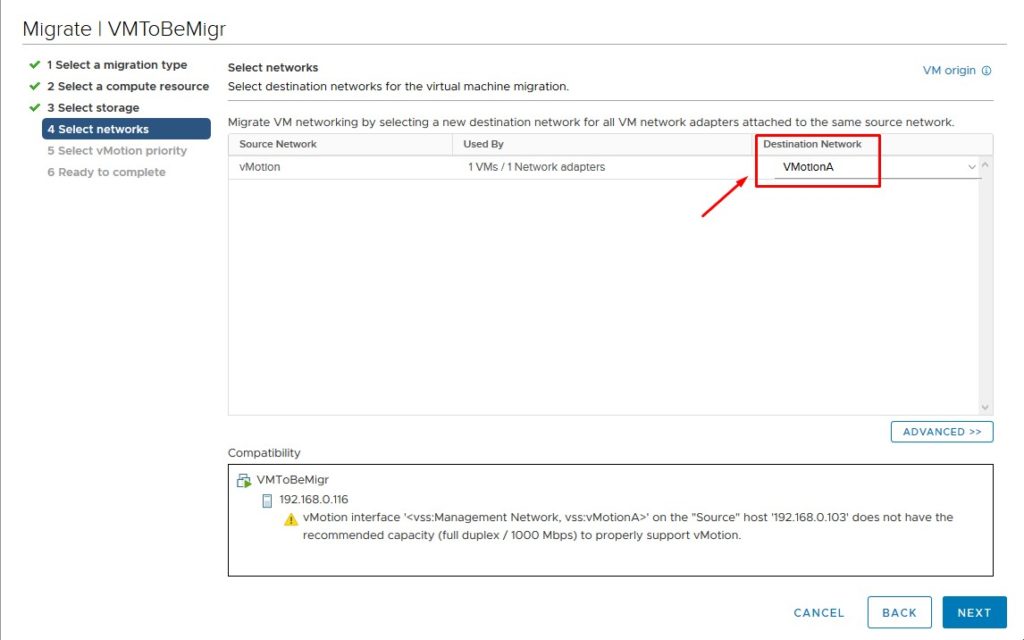
Specified Network (VMotionA) on the destination host.
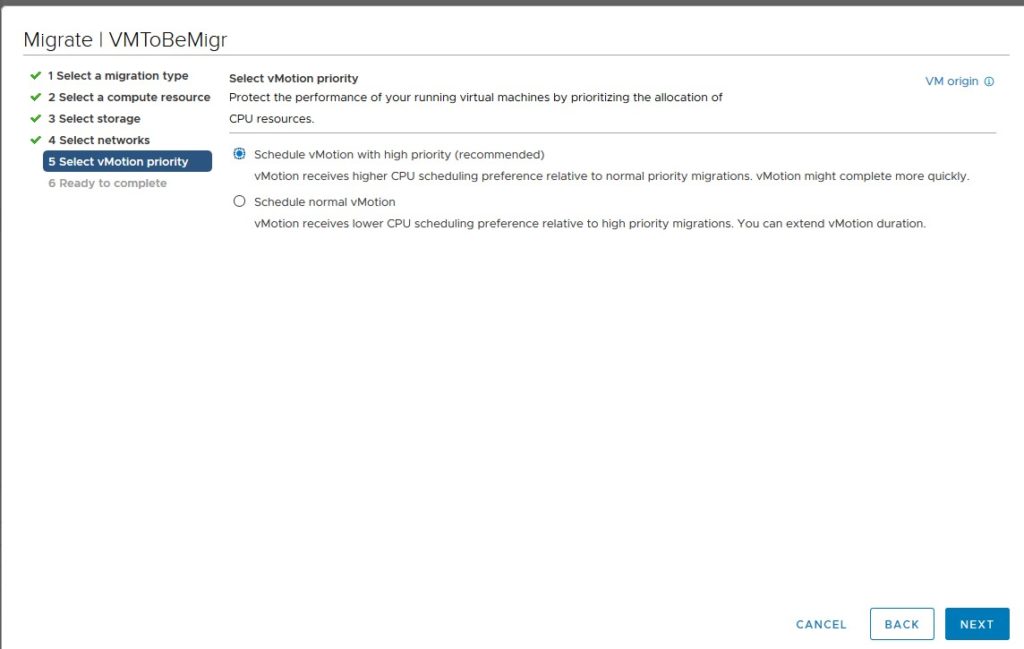
I selected vMotion with high priority which will migrate VM now. You can also schedule the migration using the second option.
Now I’m ready to migrate the VM, press Finish to start migration.
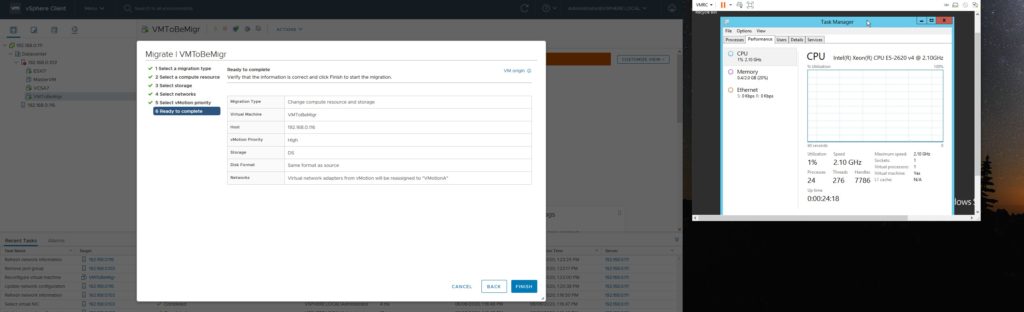
Migration is in progress now and the status is visible under the Recent Tasks view.
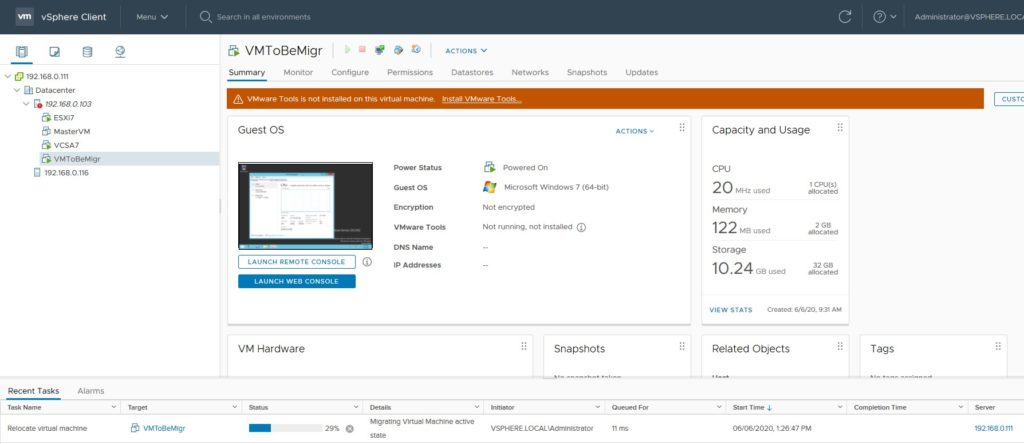
Migration is completed as you can see under the Recent Tasks view.
Now, VMToBeMigr virtual machine is running on the second ESXi (192.168.0.116) and there was no interruption.