Traditionally ACLs, firewall rules, and routing policies were used to establish and enforce isolation and multi-tenancy. With micro-segmentation, support for those properties is inherently provided. Implementing application segmentation with DFW (Distributed Firewall) allows for either multiple L2 segments with L3 isolation or a single-tier network environment where workloads are all connected to a single L2 segment.
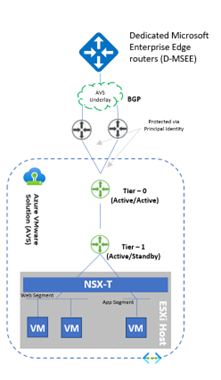
Tier-0 Gateway
- Tier-0 Gateway is configured by default in Active/Active mode for ECMP
- Northbound connectivity through BGP on Tier-0 Gateway
- Route redistribution enabled on Tier-0 Gateway
Tier-1 Gateway
- Pre-provisioned Tier-1 for workloads segments connectivity
- Route Advertisement enabled on pre-provisioned Tier-1 Gateway
- DNS Forwarder deployed on Tier-1
Demo – NSX-T Configuration
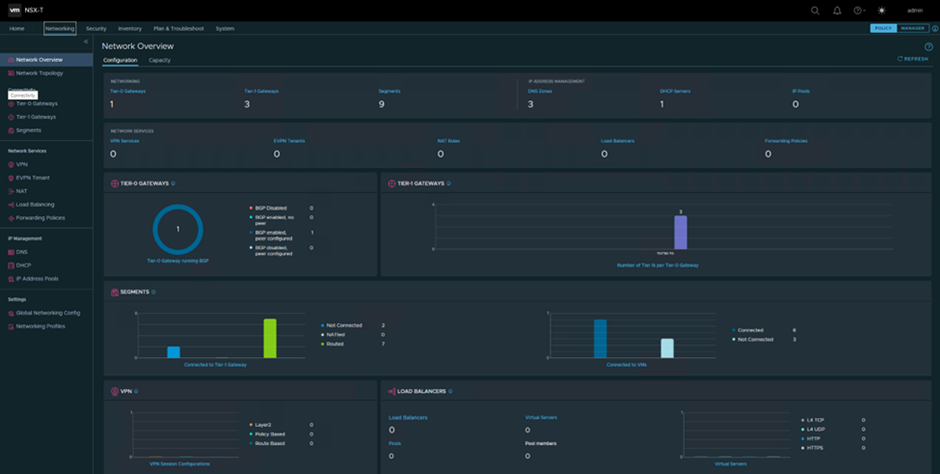
- On the Networking tab, you can configure functions such as switching, routing and layer 3 services, such as NAT, VPN, load balancing, and so on.
- Default AVS configuration comes with a single Tier-1 Gateway and additional Gateways can only be added from the NSX-T interface. Also any Logical Segments added from the Azure Portal will be configured on the default Tier-1 Gateway: TNT30-T1. For advanced networking configurations additional Gateways will be added from NSX-T:
- From NSX-T admin interface navigate to Networking -> Tier-1 Gateways -> Add Tier-1 Gateway
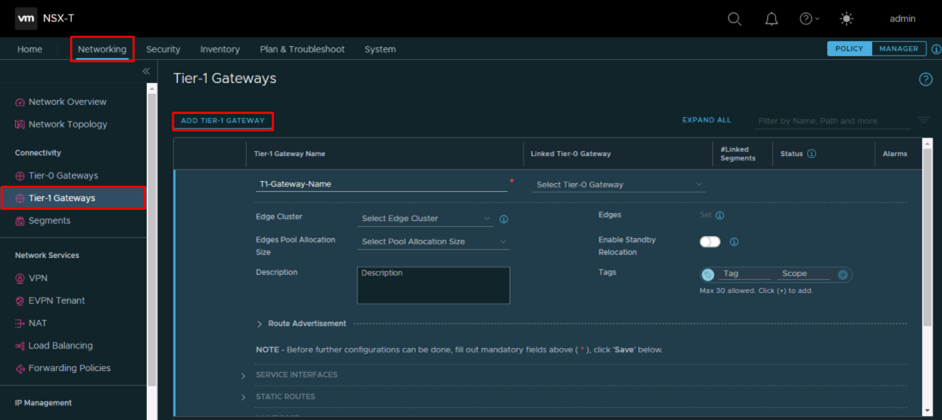
- Select Tier-0 gateway TNT30-T0 and Edge Cluster: TNT30-CLSTR
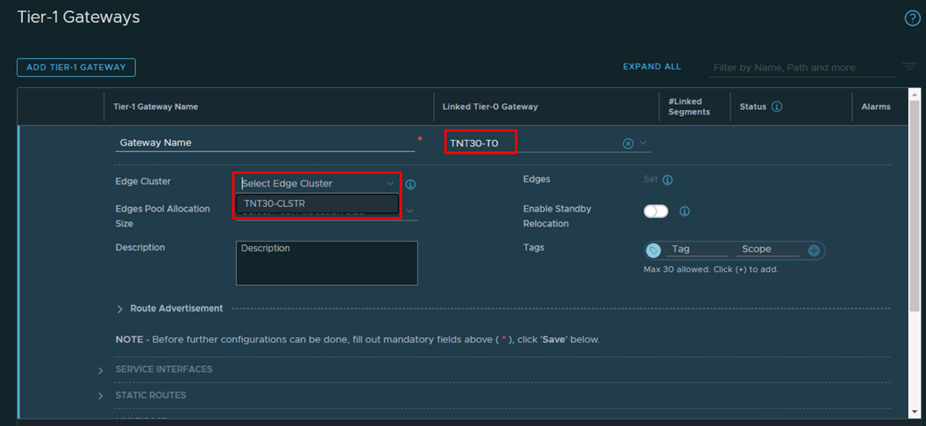
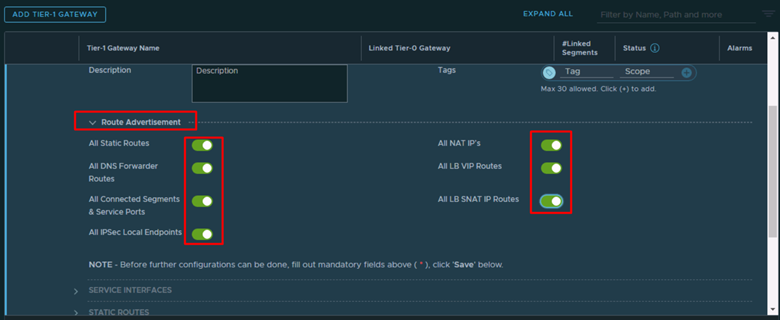
- Expand Route Advertisement and enable all options then Save.
Configure DNS
- From NSX-T interface navigate to Networking -> IP Management -> DNS -> DNS zones and click on Add DNS Zone and select Default DNS Zone
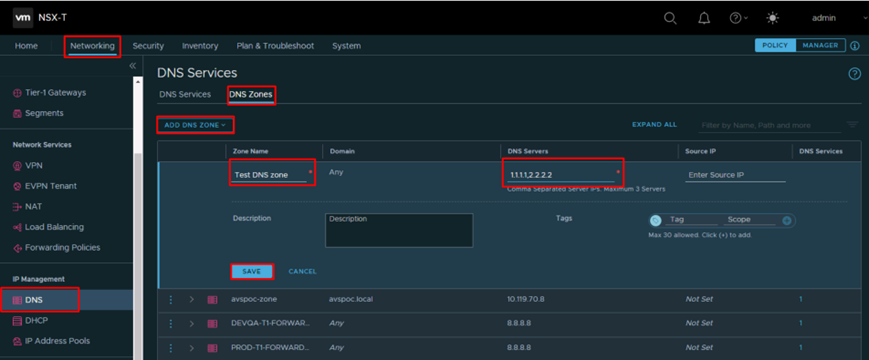
- Type the Zone Name and DNS Servers(can be public DNS or private DNS) and click on Save
Add DNS Service
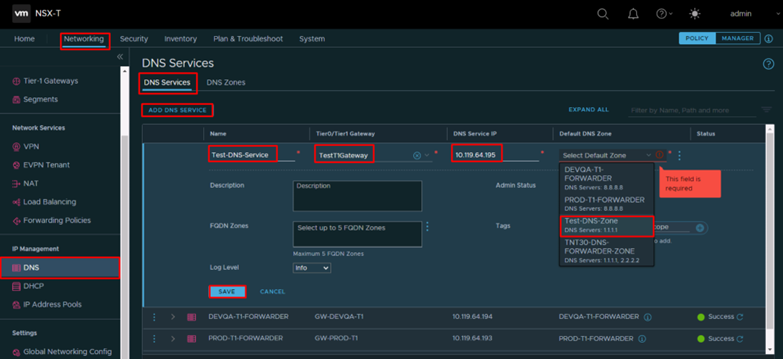
- From NSX-T interface navigate to Networking -> IP Management -> DNS -> DNS Services and click on Add DNS Service
- Type the DNS Service Name and IP address* and select T1 Gateway and Default DNS Zone
*Default DNS Service IP was 10.119.64.192 – for the other T1 Gateways created we used IP addresses from the range 10.119.64.192 – 10.119.64.195
Configure DHCP profile
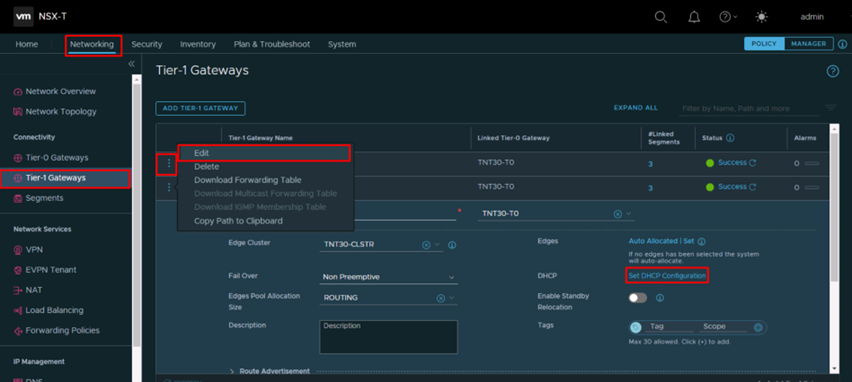
- From NSX-T interface navigate to Networking -> Connectivity -> Tier-1 Gateways, click on the 3 dots next to the Gateway Name, select Edit and click on Set DHCP Configuration
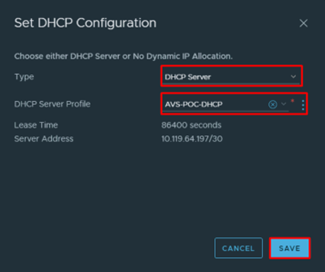
- Select Type: DHCP Server and as DHCP Server Profile the DHCP profile AVS-POC-DHCP and click on Save
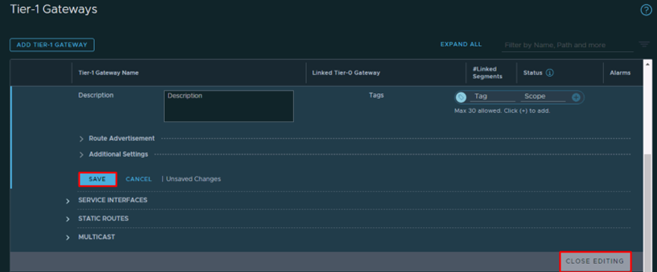
- On the T1 Gateway blade click on Save and then Close Editing
Add logical segment
- From NSX-T interface navigate to Networking -> Connectivity -> Segments and click on Add Segment
- Type the Segment Name, select the previously created T1 Gateway, select the TNT30-OVERLAY-TZ Transport Zone and type the Subnet CIDR
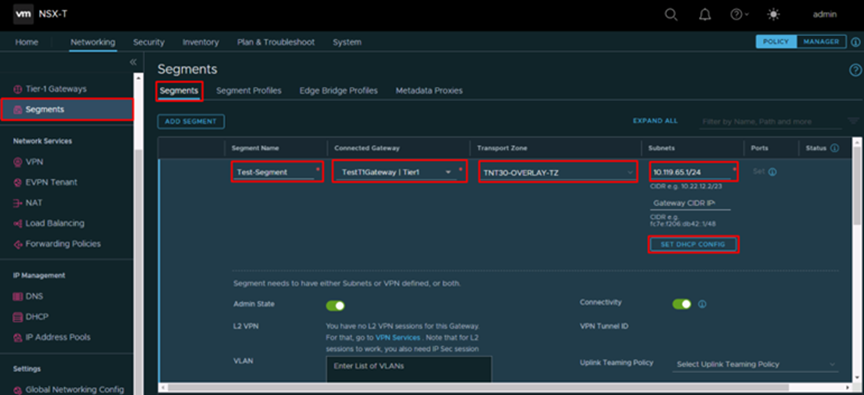
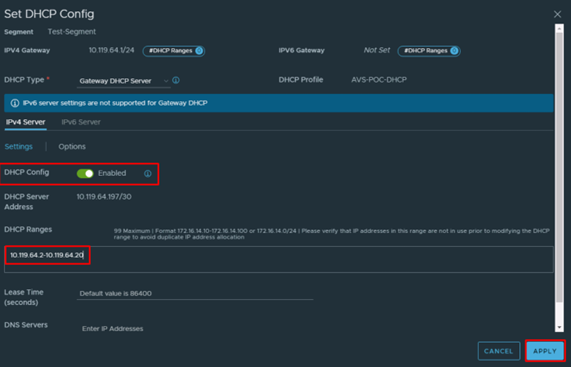
- Click on Set DHCP Config
- On the DHCP Config set DHCP Config to Enabled and specify the IP address range that will be used for allocation and click on Apply